Christmas Decor
Christmas
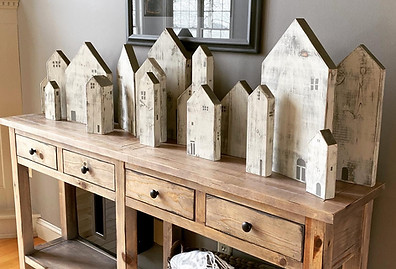
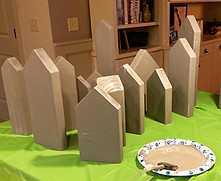
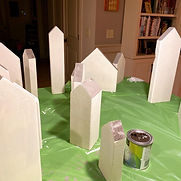
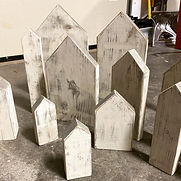
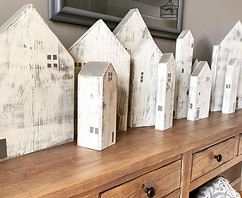
Town Scene
1.
2.
3.
4.

5.
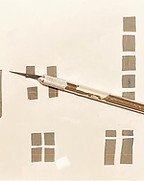
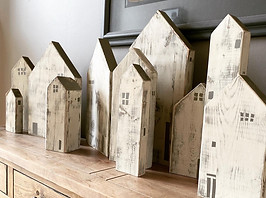
These houses are SO simple, and all made out of scrap wood. The key is to choose all different widths, and then cut them at all different heights to give visual variation. I made them all with 4 cuts on the chop saw, 2 cuts for the height, and 2 cuts (at a 45 degree angle) for the roof. 1. Paint them all a warm gray (a gray with hint of brown in it). 2. Paint them in an off white. 3. Sand them all, taking care to really sand the edges well. 4. Cut out funky doors and windows out of contact paper. I never used a stencil twice, so I made A LOT of these. Stencil the windows and doors using the same gray you used in the first coat. Don't over do it-just a hint of windows and doors. Too many would be too much visually.

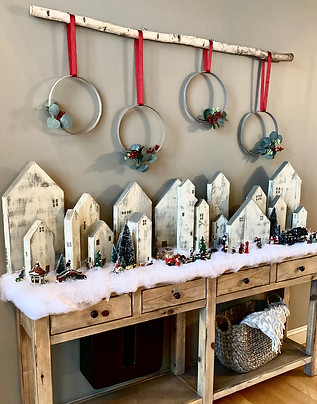
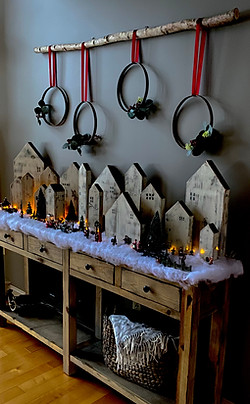
The little Christmas trees and figurines are from Lennox. The "snow" from Hobby Lobby, and the lights are little fairy lights. I made the wreaths from simple wooden rings I found here on amazon. I stained the rings gray, then attached berries and greens I found at Target using thin silver wire.
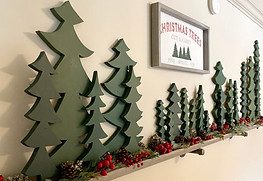
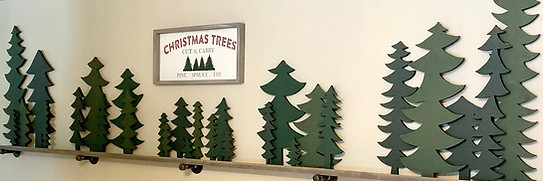
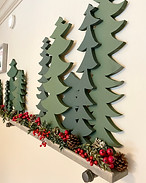
Christmas Tree Farm
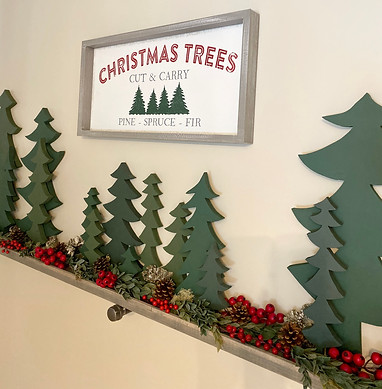
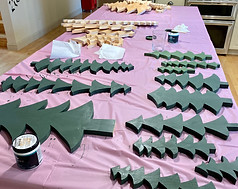
I made all these trees on my band saw. The key: cut them all different hieghts, widths, and number of "branches" to give them visual variety. Also, divide them into 3 groups (making sure to have tall, skinny, and short in each of the groups) and paint each group a different shade of matte green, to give them depth. These took me quiet some time to do, I started in the summer! The bottom portion on the ledge shelf is a mixture of moss and pine cones I found in the woods, and artificial *matte berries and greens I found at Hobby Lobby.


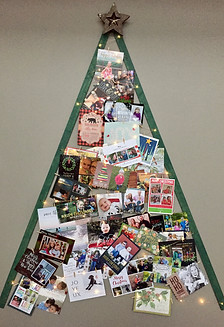
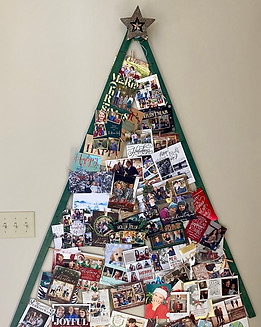
Christmas Card Holder
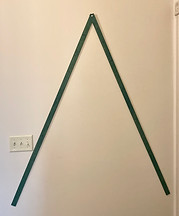
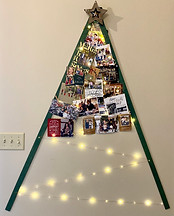
This super easy DIY Christmas card holder can be made using this Shopping List:
-
Two thin slats of wood the length you need
-
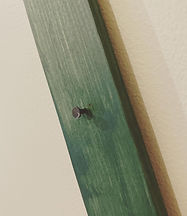
One cap nut & connector bolt
-
Carpet tacks
-
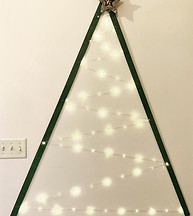
Long string of fairy lights
-
Tiny clothes pins
-
Command Strips
-
Star for the top
Past years:
Steps:
Two thin slats of wood the length you need
-
Paint or stain wood
-
Drill a hole through the top of both pieces
-
Slide bolt through the hole and attach connector (this makes the "tree" collapsible)
-
Nail carpet tacks in zig zag pattern. Make sure they stick out (to use as an anchor for the fairy lights)
-
String fairy lights and attach cards to the fairy lights with tiny clothes pins. Make sure the cards sit behind the lights, so you don't lose their glow
-
I attach this to the wall using command strips!