Easy Shelving
Ledge Pipe Shelves
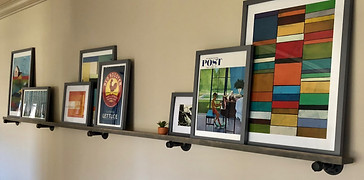
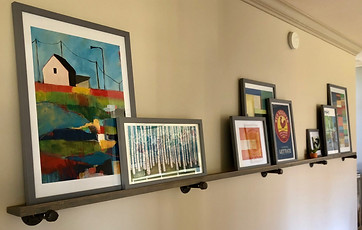
Ledge shelves are popular right now, and for a good reason. They allow you to layer, rearrange, and change your decor as frequently as you'd like, without further damage to your wall. The important thing to keep in mind with these industrial looking pipe shelves is that the pipe needs to go directly into a stud.
Before you go to the hardware store, Look at your space. Figure out where the studs are, then measure and center where you want your shelves to go with your studs in mind.
Shopping List:
-
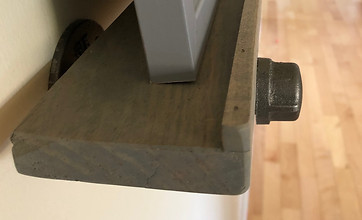
1" or 1.5" board the length you need (most stores like home depot will cut your boards to the exact length you need for free)
-
Pipe caps (this is the piece that goes on the very end of the pipe
-
Pipe nipples (the length of pipe). You want this to be roughly the depth of your board. Stores will cut these to size as well, but often you can find the right length you need.
-
Pipe flanges (the piece that the nipple fits into and the piece that is screwed into the wall)
-
Small square dowel, which you can buy in 3' or 4' lengths. Make sure to buy enough to span your entire shelf.
-
Nail brads or nail gun. If you aren't using a nail gun, make sure to pre drill holes into the dowel before you hammer it to the edge of your shelf.
-
Stain or paint
Pinterest (as always) was my inspiration. If you type in "DYI pipe shelving" a slew of great projects come up!
Floating Shelf
This shelf is so sturdy you could stand on it. It's supported on the inside by 2x2's that are screwed into studs. I followed the plans by Thrifty & Chic ( click here), which were simple and easy to follow.
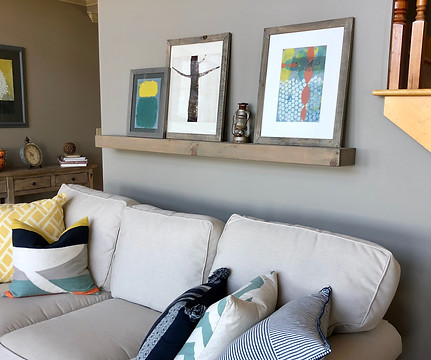
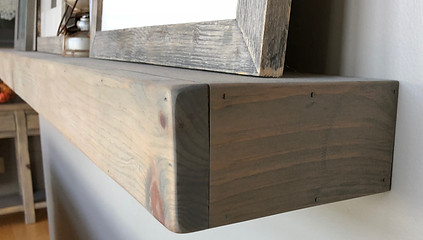
See the little gap at the top left of the shelf? It's a result of the wood being warped. I could have easily fixed the problem in the beginning with wood glue and clamps, but I didn't notice it. And now that it's up-I'm too lazy to take it down.
Industrial laundry room shelving
over washer & dryer
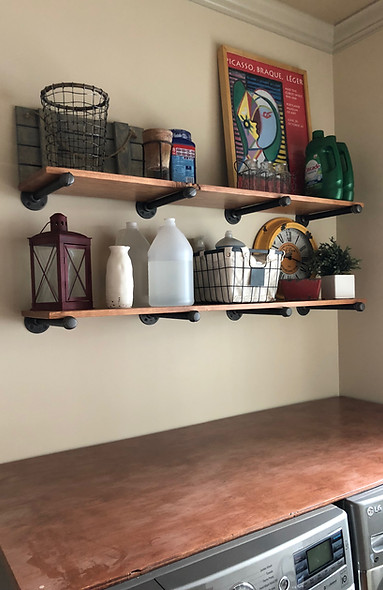
These shelves are super easy, and can be accomplished with very little tools. The most important thing to keep in mind is that the pipe needs to go directly into a stud.
Before you go to the hardware store, Look at your space. Figure out where the studs are, measure and center where you want your shelves to go with your studs in mind. You cannot put the pipes into only drywall--they are way too heavy. If the way your studs are spaced won't work with the placement of your shelves, then do a floating shelf like the one above, where your supports are hidden.
Shopping List:
-
1" board the depth you need (most stores like home depot will cut your boards to the exact length you need for free)
-
Pipe caps (this is the piece that goes on the very end of the pipe
-
Pipe nipples (the length of pipe). You want this to be roughly the depth of your board. Stores will cut these to size as well, but often you can find the right length you need.
-
Pipe flanges (the piece that the nipple fits into and the piece that is screwed into the wall)
-
Stain or paint
Again, Pinterest was my inspiration. Type in "DYI pipe shelving" for more great projects.
Notice in the picture the top of the washer and dryer is covered by 1/2" plywood that I stained to match the cupboards in the room. Home Depot cut the 8'x4' plywood to the exact size I needed (for free) and after sanding, staining, and polyurethaning it, it became the perfect folding station.
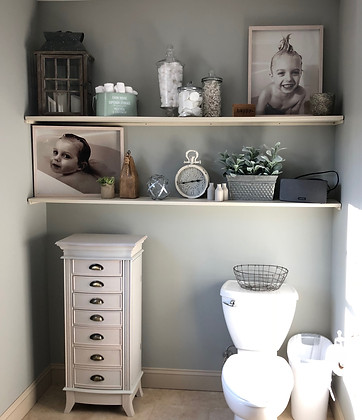
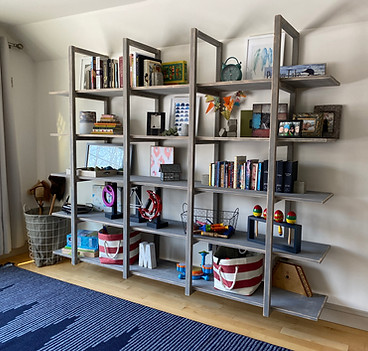
Super easy wall to wall shelving
These shelves were extremely easy to construct, but I would do a lot differently. I wanted the look of thinner shelves, but they aren't as sturdy as the floating shelf I did in my living room. Regardless, they work just fine. To make sure these shelves were properly supported, I had to anchor them to thick square dowels on three sides. The dowels (as you can see in the picture because I never patched them-whoops) are screwed into every stud they pass.
Ledge Shelf + Coat/Towel Rack
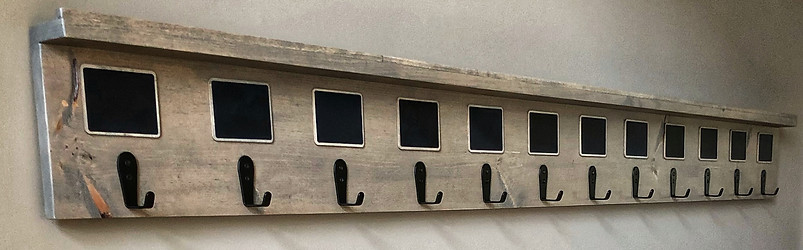
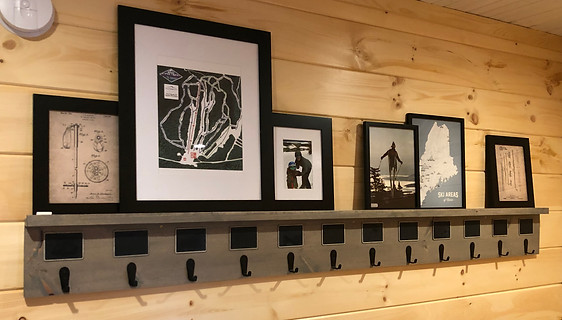
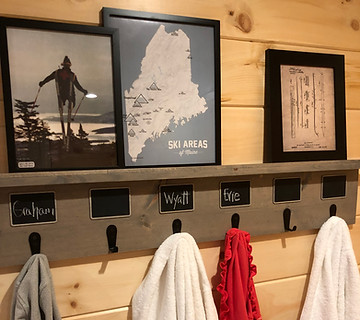
All I did is add a 1x8 to the bottom of a ledge shelf, add some tiny chalkboards from Amazon (click here) and some sturdy matte black hooks, and viola! You have function and home decor.
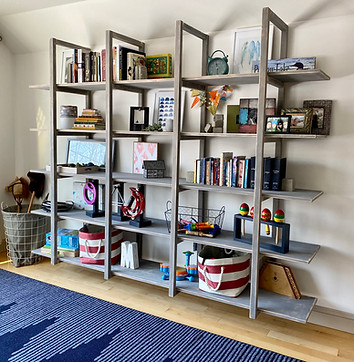
Easy Ladder Shelving
Step 1:
Figure out the dimensions of your shelves. Mine where 8' long, and I wanted them 15" deep. So I had Home Depot cut 3/4" plywood (4'x8') into 14.5" strips, then faced the shelves with 1/2" plywood strips. While you're there, gather as many grade 1 2x2s for your project that you'll need, make sure they are nice and straight.
Step 2:
(I stained all my wood before this step to make it easier down the road.) Cut the rungs of your ladder the exact size of the depth of your shelves, plus 1/8" to give you a tiny bit of room. Cut the ladder rails the height you want your shelving unit to be.
Step 3:
Figure out the spacing you want your shelves, and cut a leftover piece of 2x2 to that exact length to help with accuracy. I took a long T-square and with a pencil drew a line where each of the rungs will be placed. With all of the ladder railings placed together, this is a quick accurate way to do it. See pic A. Make sure to think about which side you draw your pencil line, because the opposite side will be the outside of the ladder, and thus, the visible side.
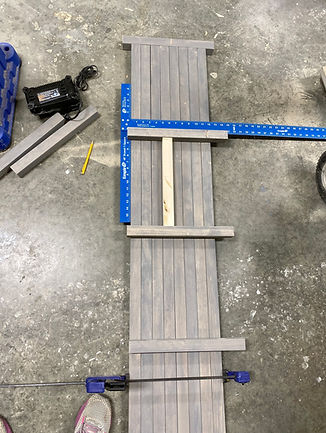
Pic A.
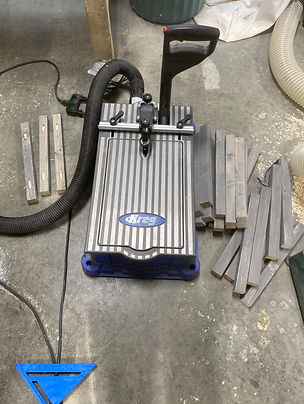
Pic B.
Pic C.
Step 4:
Put one pocket hole (using the kreg jig) on either side of the ladder rung. This is how the rung will attach to the rail. I used my Kreg Forman for the job, which made it super fast and simple (Pic B). Attach rungs to rails with pocket screws, pocket holes facing up (so they'll be covered by the shelves). See Pic C.
Step 5:
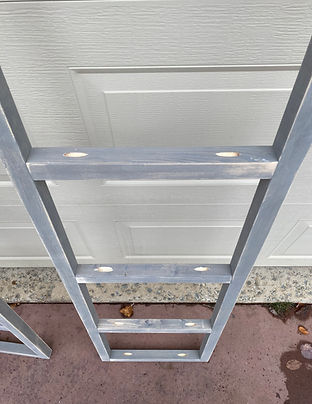
Screw ladders onto the wall, making sure the screws go directly into a wall stud. No exceptions. Each time you put a ladder up, make sure it is 100% level with the others. When you're done, lay your shelves across, secure them with a screw into the rung, and voila! Ladder shelving! When it's all done, it should feel rock solid. I put mine above the woodwork so I wouldn't have to cut into it, and so I could easily vacuum underneath the unit.